Unboxing
(00:05):
Hello friends. So today I wanted to go through the process of what happens when you purchase a do-it yourself Mala making kit from Sakura Designs. What you would need to have at home to begin to string your own mala beads and what happens when you buy the kit. And so- let’s do an unpacking! So you actually get a tube here with a Mandala print that says a mala making kit, DIY. So it’s perfect for giving. So if you wanted to have a gift sent to a friend to make their own mala, it comes in this cute little tube. And when you get it in the mail, you go ahead and open it up and it has a series of different things in there. The first thing you’ll see is a mala pouch, and that is a brocade silky drawstring pouch. And that will be used to store your mala in.
Basic Tutorial
(01:07):
Once it’s done, we will get 108 of the primary beads, whatever you choose. And we are now offering both six millimeter beads and eight millimeter beads you can choose. Now, whenever you do these malas, you can put a knot after each bead, or you can just string them easily 108 beads on the court. So there’s no need to knot them, but it’s just a nice meditation to do to have a knot. After every bead, you can do a mantra practice. So it just makes it a little bit more special. And once again, it takes about two hours or so to make them all. So you get 108 of your primary beads, and then you get, we have a new thing now where we’re offering a ready-made tassel. You can open that up, and you can see we found that’s a lot easier than having folks try to make their own tassel at home.
What’s Included
(02:10):
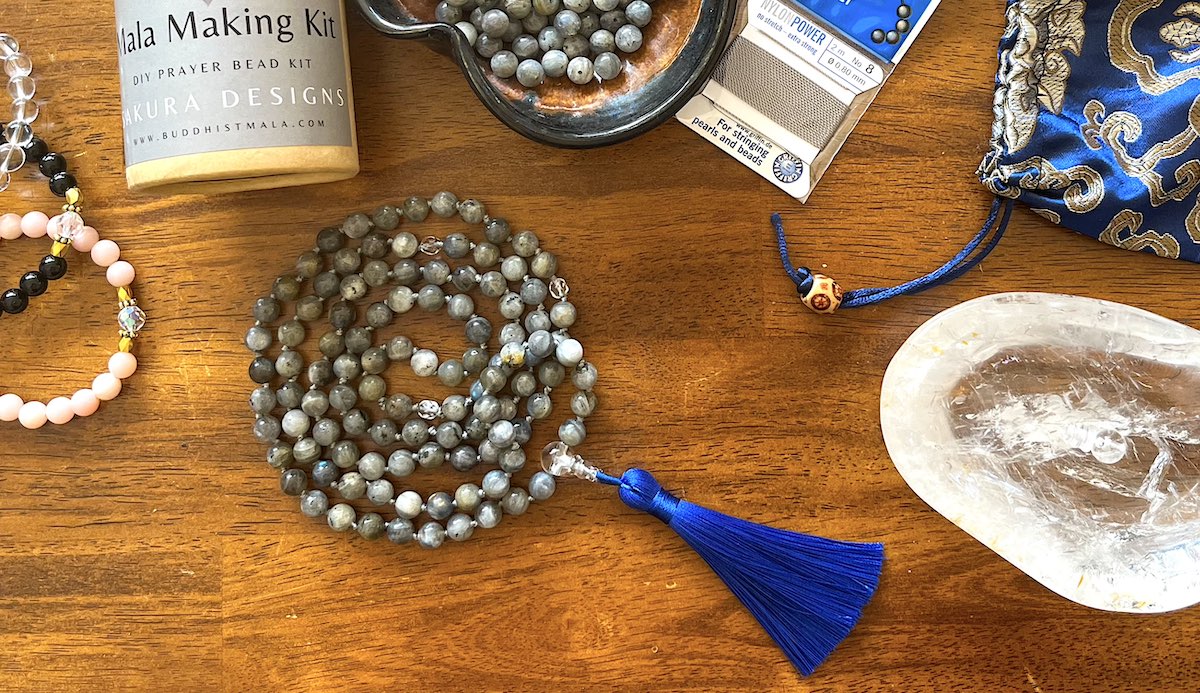
So you’re getting a ready-made tassel, and they’re about three and a half inches. You also get two packets of number eight Griffin cord because you may want to redo it twice, or if there’s something happens, and you make a mistake, you’ve got two. Just to ensure that you’ll be able to string your mala properly since this is buddhistmala.com- we also have a three hold guru bead that comes in your kit. And we have a series of pewter spacers, clear crystal markers and a pewter OM pendant. So you’ll get that in there as well. So you have everything you need to string your own mala at home. And once again, we do have a D I Y tutorial. Here’s the finished product. This is an eight millimeter Labradorite mala that we have knots after every single bead, so it’s really beautifully done. And in order to begin the process, you’ll need a few things, which are household items…
What You Will Need
(03:29):
In addition to your kit, you should have a pair of pretty sharp scissors to have on hand, a lighter, household lighter or a match, a comb to just comb at the end for your tassel and then a needle. It’s good to have a needle in the event that while you’re making your knots, if there’s an accident where one is a little bit too loose, you can use this needle to untie it and restart. And then it’s a good idea if you have two bowls. So you’ll have one bowl here that you’ll put your primary beads in to begin nodding, and then a secondary bowl for the marker beads. So you can pour those out into that one here.
Finishing the Mala
(04:25):
And then as we’ve already gone through the tutorial, you begin by opening up your cord. You’ll give it a good stretch, leave a little bit on the card, and you’ll begin by this time starting, if you’ve got 108 beads on your mala, you’re actually going to start at the top here. You’re going to start at the top, spacer bead, and you’re going to place this one first and then don’t do a knot because that knot will happen at the end when you finish it with the other cord. So you’re going to start with at the top of your mala. So that’s going to be your 55th bead, and you’re going to put the spacer on first and then one of your main beads. And then you begin to knot around and it’s very easy to get to the end and to put the tassel on through the three hold guru bead back up knot. And then you’re going to finish by going back through the bead with a knot, and we’ll go through this together. Since this is a new way of stringing them, that is a lot easier when I’m integrating the ready-made tassels.
So thank you so much and I hope you enjoy making your ready made mala from Sakura Designs, and thanks so much for watching!


